Setting up Eclipse CDT for OpenGL with GLFW and GLAD
What’s OpenGL?
OpenGL is an API to render 2D and 3D graphics. Remember that an API (Application Programming Interface) is an interface for interaction between components of a system. Typically, an API defines a set of functions, protocols and/or tools. I’ll skip the details about the client-server model, but OpenGL allows a client program to communicate with GPUs (Graphic Processing Units, e.g., your videocard) to achieve faster, hardware-accelerated rendering. That’s why OpenGL is a common topic in the game development scene.
OpenGL is focused on just rendering. It’s an API to write and read data from a framebuffer, and that’s it. It won’t handle user input, or sound playback, or loading a PNG image. It does not even have functions to create or close a window. We’ll need auxiliar libraries for all of that.
A minimal OpenGL window
So we want to build a minimal OpenGL application on Windows. We’ll create an empty window with an OpenGL context, using the GLFW and GLAD libraries. In the following, I assume we’re using a 64 bits version of Windows. I’ll also be relying on mingw-w64. In summary, these are our assumptions:
- Windows operating system (64 bits.) Things will be a tad different for macOS and Linux users.
- Eclipse CDT.
- mingw-w64 to build GLFW from sources. Besides, our Eclipse CDT project will be compiled with the gcc version of mingw-w64.
- GLFW and GLAD libraries.
What’s GLFW?
As told, OpenGL does not provide any facility to create a window, retrieve user input, create the OpenGL context, etc. These functionalities depend on the operating system. GLFW is a C library which provides a neat abstraction layer to handle all of this on several platforms. Notice that GLFW is focused on management of windows, OpenGL contexts, user input and time. It will not play sounds, or load images, etc.
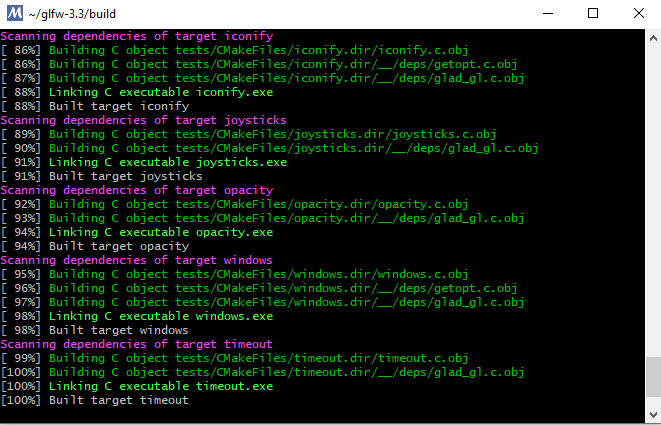
I’ll build GLFW from sources. Download the source package of the GLFW library from here. Once we’ve downloaded the source package of GLFW, it’s compilation time. Verify that you’re running mingw64, and that you have all the required development tools for building GLFW with CMake. You can install all those tools via:
pacman -S --needed base-devel mingw-w64-i686-toolchain \
           mingw-w64-x86_64-toolchain git subversion mercurial \
           mingw-w64-i686-cmake mingw-w64-x86_64-cmake
(That might take a while.) Unpack GLFW sources. Then cd to the directory where you unpacked such GLFW sources (e.g., cd glfw-3.3), create a build subdirectory and invoke cmake:
mkdir build
cd build
cmake -G"MSYS Makefiles" ..
make
Done. Now you should have a compiled GLFW. We’re mostly interested in file libglfw3.a under build/src. There should also be several example programs under build/examples.
What are you GLAD for?
We’ll be using GLFW to create our window and the OpenGL context. OK. However, how do we effectively use OpenGL? In other words, we need a way to communicate with the driver or OpenGL implementation on the platform our program will be run (Windows.) We could follow a”manual” approach for this, and use the Windows API to query for each OpenGL functions. Once Windows has provided us with a function pointer for each OpenGL function we can use such pointer to request services from the OpenGL implementation. A cumbersome process.
That’s what we are glad for. The GLAD library will load all of those function pointer for us. As this is very platform-specific, we need to retrieve the proper GLAD version for our purposes and target. Fortunately, there is a webservice we can use to get the correct GLAD. Cool. For this minimal example I used these settings:
- Language: C/C++
- Specification: OpenGL
- API gl: Version 3.3
- Profile: Core
- If not ticked, tick Options “Generate a loader”.
Then click “Generate” and download file glad.zip.
Our project in Eclipse CDT
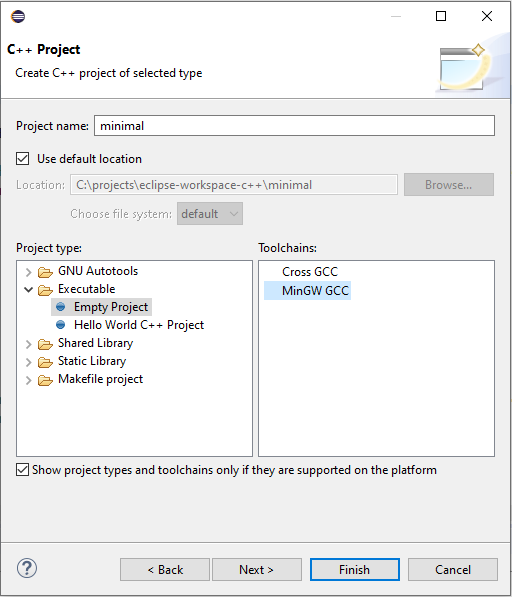
If you don’t have it, download Eclipse CDT, a nice C/C++ IDE based on Eclipse. Open Eclipse CDT and create a new C/C++ project (I chose the CDT’s managed build.) Type a name for your project. Then, select the project type (Executable: “Empty Project”.) For Toolchains, I’ll pick “MinGW GCC”.

Now we’ll complete our project’s configuration. We have to provide the paths to our libraries and includes. I have the following directory structure:
projects/libraries/
                  glad.c
                  includes/
                          glad/
                              glad.h
                          GLFW/
                              glfw3.h
                              glfw3native.h
                  libs/
                          libglfw3.a
Select your project on Eclipse and press Alt+Enter to edit the project’s properties. Then, under C/C++ Build click on “Settings”. Set:
- GCC C++ Compiler, Includes, Include paths: path to your includes, for instance, “C:\projects\libraries\includes”.
- GCC C Compiler, Includes, Include paths: path to your includes, for instance, “C:\projects\libraries\includes”.
- MinGW C++ Linker, Libraries, Library search path: path to your libraries, for instance, “C:\projects\libraries\libs”.
- MinGW C++ Linker, Libraries, Libraries: libraries will be linking to. Add
glfw3,gdi32andopengl32.
Now add a source file to your project, and copy-paste the example code on GLFW Documentation page. Your project should compile and run like a charm, displaying a “Hello World” window.
What about GLAD?
With GLAD we can go beyond just creating a window. We can effectively use OpenGL. Of course we don’t need anything else for just an empty window, but your project is already configured to start using OpenGL. Just add #include <glad/glad.h> before #include <GLFW/glfw3.h>, and initialize GLAD before invoking any OpenGL functions, and after initializing GLFW:
if ( ! gladLoadGLLoader((GLADloadproc)glfwGetProcAddress) )
{
   return -1;
}
Don’t forget to add the file glad.c to your project.
It’s done. Now you can start calling glViewport, glGenBuffers, etc.
